Hexo搭建博客-butterfly主题
Hexo搭建博客-butterfly主题
注册Github https://github.com 账号
需要一个邮箱作为注册账号(注:请不要使用有QQ、手机号等有隐私信息邮箱,可在对应的邮箱申请自定义的英文邮箱)
Node.js安装
https://www.runoob.com/nodejs/nodejs-install-setup.html
Git安装
下载地址 [https://git-scm.com/download 默认选项安装即可
安装完成后,在开始菜单里找到“Git”->“Git Bash”,蹦出一个类似命令行窗口的东西,就说明Git安装成功!
安装完成后,还需要最后一步设置,在命令行输入:
1
2
git config --global user.name "GitHub用户名"
git config --global user.email "GitHub注册邮箱"生成SSH KEY
1
ssh-keygen -t rsa -C "你的GitHub注册邮箱"
Git 和github绑定
1
vi .ssh/id_rsa.pub
复制窗口中的密钥 新建一个txt文件看看有没有复制成功
快捷键 esc shift+: q 退出文件编辑页面
- 登录GitHub
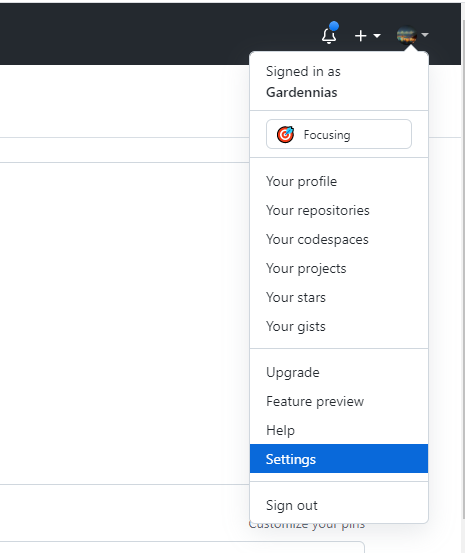
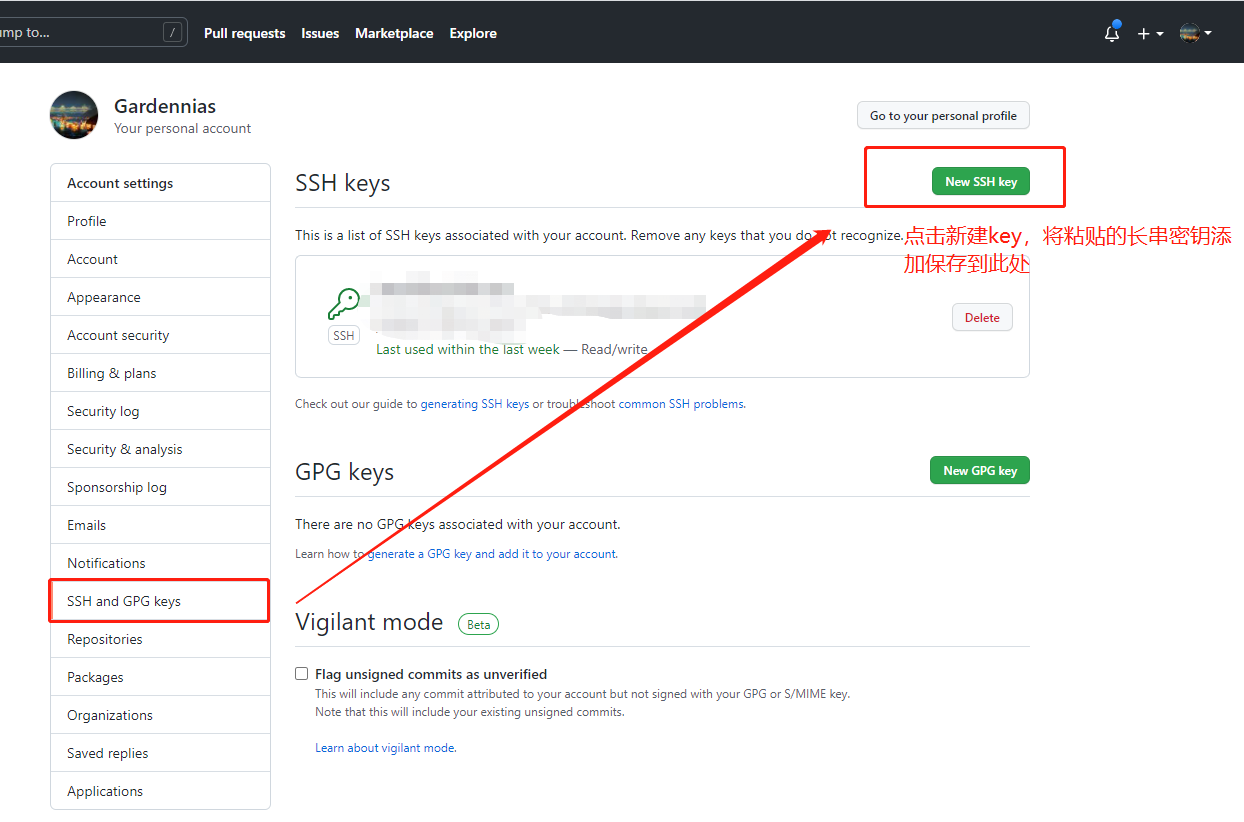
settings—>SSH and GPG keys—>New SSH key
GitHub创建个人仓库
仓库名为:用户名.github.io 例:Gardennias.github.io
安装 Hexo
所有必备的应用程序安装完成后,即可使用 npm 安装 Hexo。
1 | BASH |
进阶安装和使用
对于熟悉 npm 的进阶用户,可以仅局部安装 hexo 包。
1 | BASH |
安装 Hexo 完成后,请执行下列命令,Hexo 将会在指定文件夹中新建所需要的文件。
1 | PLAINTEXT |
新建完成后,指定文件夹的目录如下:
1 | PLAINTEXT |
安装主题butterfly
进入项目根目录
1 | git clone -b master https://github.com/jerryc127/hexo-theme-butterfly.git themes/butterfly |
安装插件
1 | npm install hexo-renderer-pug hexo-deployer-git --save |
_config.yml
- 网站的 配置 信息,您可以在此配置大部分的参数。
1 | # 设置主题为 butterfly |
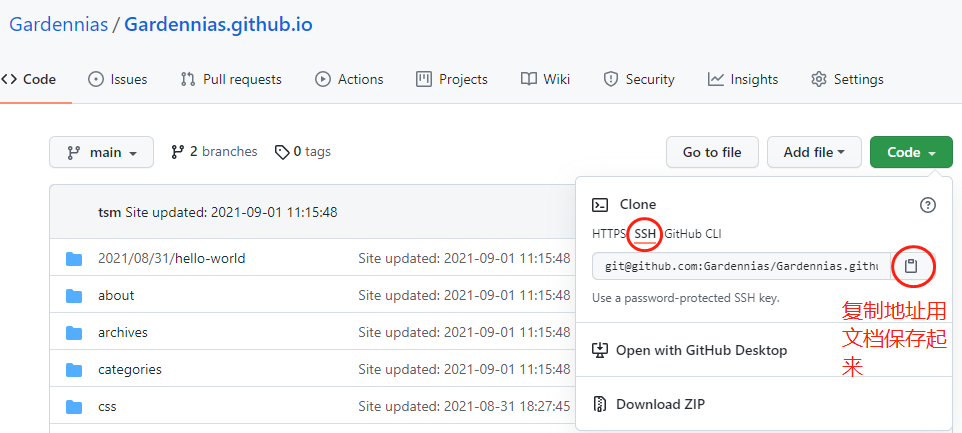
repo 更换成你创建项目GIT的地址
- 复制 butterfly 主题下的
_config.yml内容,粘贴至_config.landspace.yml,重命名为_config.butterfly.yml
直接导入文章
可以将你平时写的文章直接导入到 _posts 文件夹里,注意文章类型得是 md格式。
Create a new post
1 | hexo new "My New Post" |
More info: Writing
Run server
1 | hexo server |
More info: Server
Generate static files
1 | hexo generate |
More info: Generating
Deploy to remote sites
1 | hexo deploy |
本博客所有文章除特别声明外,均采用 CC BY-NC-SA 4.0 许可协议。转载请注明来源 Gardennias!
评论


